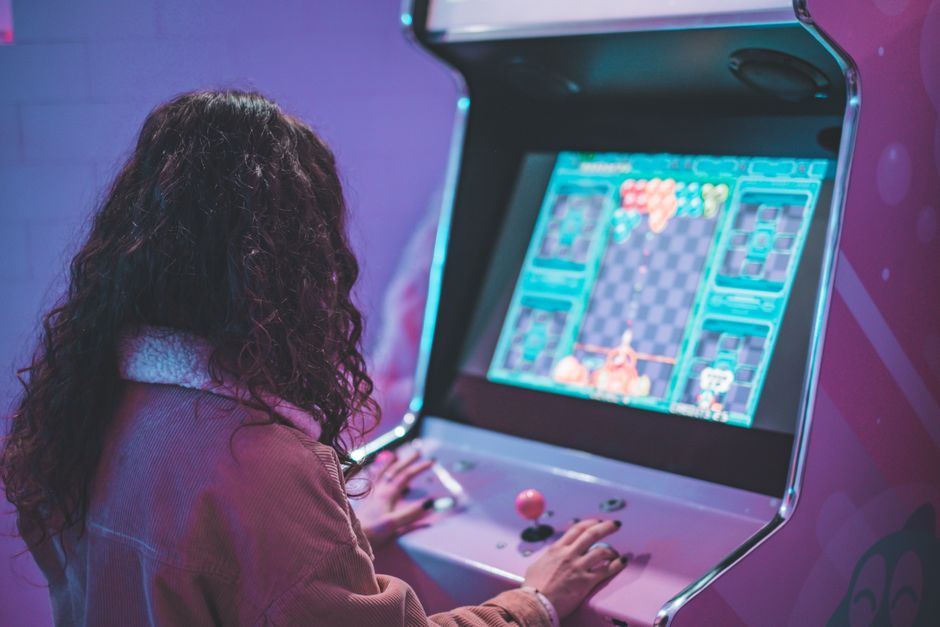
Effortless Online Banners for Business and Social Media

Online banners. They’re everywhere these days. Why? Because they work. Sitting in high visibility spots, making sure they capture the browser’s eye when it wanders. Okay, time for you all to go. Eyes on me people. Great banners invite viewers to learn more in a respectful and relevant way. Bad banners are like a noisy person in a quiet library. They’re distracting and annoying, and we transfer that annoyance to the thing they’re promoting.
Out! Stick around and I’ll show you how to easily make banners for social media and web pages in under 10 minutes.

Online banners, whether they’re advertising something or just helping create a visual theme, are pretty common. We see them on the web, social media sites, in apps. They’re everywhere. So, it’s surprising more people aren’t using them to promote themselves or their business. Why is that? Do they think they’re too hard to create? Maybe that was true in the past, but Canva makes it so easy and quick you really have no reason not to Banner-Up! Nice. Banner-Up. I just came up with that. Okay, before I show you how easy it is, make sure you subscribe to our channel. We’re dropping new videos every week. If you’re ready, let’s jump into Canva. Starting on the Canva homepage, we’ll type in banner. This brings up all sorts of banner templates. Different sizes, banners for wedding sites, social media headers, everything you can think of. The ones with crowns are for Canva for Teams or Pro subscriptions.

The ones without are free for anyone.

Look, this is how many templates are available for this search. That’s a lot. We might need to be a little more specific. Let’s try Facebook banner, otherwise known as a cover photo.
Okay, this is better, and a great way to show you how quickly you can customize a template. At Canva, when we talk about templates, we talk about starting inspired. It’s just so much easier than starting with a blank page. And I don’t care what you say.

It’s not cheating.

It’s efficiency. Okay, this is the template I’ve chosen. It has a professional business feel. Perfect to promote my time efficiency classes. Watch how easy it is to customize. First, I’ll upload my photo here. This image is already a frame, so I can simply drag in my photo like this, and it automatically replaces it. Now, I’ll change the text. You can see these text boxes are all individual.

I’ll add my text, and I’m going to drop the size of this one, so the hierarchy stays with the title of the classes. I’ll change the color like this. Add in a description, change this call to action, and add in my website address. How easy is that? Now, this is ready to post. I’ll go here, and download this as a PNG file, like this. And then I can upload it to my Facebook as my cover photo. This is what it looks like. Nice. I’m ready for the inquiries to come flooding in. And now that I’ve got the base idea, Canva makes it really easy to resize my design, so I can apply it to other social media platforms.

What I’m about to show you is a Canva Pro feature.

Of course, you can always sign up for a free trial. The feature is called Magic Resize, and with a few simple clicks, I can modify this design, so it fits. How about a LinkedIn banner? Click the copy and resize button here, and Canva will make a new document for you using the correct size. Now, as you can see, I’m going to have to move some things around a little, so I make use of this space. Move this here, this over here. Make sure you leave some space for the profile pic. I’ll just finish this bit here. Okay, that’s looking pretty good, and a lot quicker than remaking it from scratch. This is how it looks in the wild. So that’s how you would tackle the common social media banners and cover photos, but now it’s time to introduce you to the three usual suspects of web advertising.

The ringleader, Mr. Leaderboard. His lover and accomplice?

Wide skyscraper. And their trusty sidekick, medium rectangle. Together, they steal your attention whenever you go surfing across the web. There are many others in their gang, but these are the big players, and the ones most people start with. To get started, let’s see what happens when I use Magic Resize on the medium banner. Again, it’s got the right size. 300 by 250 pixels. So now I just need to move things around and make sure I’m using the space to maximum effect. Let me race through that quickly. Uh-huh. Yep. Good. Alrighty. That’s looking pretty good. You can see how quickly I could resize this ad to fit the leaderboard in skyscraper sizes. But I’m getting a bit bored with this business.

It’s time to change things up and get a new career. Drum roll, please. (drum roll drumming) Okay. Not quite what I was expecting, but I do appreciate a comfortable insole and a commanding heel.

Let’s jump back into Canva and make a leaderboard banner ad for my sensible office shoe store. I’ll start on the home page and type in leaderboard ad. You’ll see that it’s 728 by 90 pixels. There are a bunch of templates I could choose here, but this time I’m going with a blank option. The first thing you’ll see is it’s very thin. You really need to think about the hierarchy of your information here. What’s the one thing you really need to stand out? Normally it’s some text with high call-to-action value, or the logo. You’ll need that to be prominent to build up brand recognition. What should be less attention grabbing?

Normally the images. You need them on there, but with an ad of this size, they’re there to support, not take over. Or the contact details. They can be pretty small, if you have them at all. Okay, that’s looking pretty good already. Let me throw a colorful background in here. Great, that really helps the text stand out. And just like magic, I can resize it, turning it into a 160 by 600 pixels wide skyscraper banner ad. Again, I’ll move a few things around. And there, we’re all done. Because we’re working in such a tight space, sometimes it’s better to spread the information across a few pages.

And we can utilize animation. This way you can put your ad into motion and really grab attention. It sounds complicated, but it’s not. Let me show you how. I’ll just head up here and duplicate the page a few times. Now I’ll delete some of the information from here and really think about how the content is being delivered to the audience. “Need shoes?” And then on this page, “Need John.” And then on this page, I’ll hit them with the details, logo, and maybe another call to action.


Don’t delay, drop in today. Nice, that rhymes. Now I’ll click on the background of this first page and hit the animate button at the top. Because I’ve clicked on the background, I can now choose page animations. I’m going with pan for this page. The next, I really want it to pop, so I’m going to choose the type and select the pop animation. On the final page, I’m going to select the background, and this time choose a combination animation, like fun. This combines a few different animations together. There’s a lot of information on this final page, so I might just extend the timing a little.

Just do that here.

While I’m here, I might reduce the first two pages so they’re more impactful.  Let’s see what it looks like by pressing this button.  Nice. Now I’ll need to save this as a GIF or an MP4. Just go to the share menu, go to Download, select the file type, and hit this button.
And that’s it. You are now officially an online advertising expert. Well, not quite. But you know how to use Canva to build banners and promote your business through social media and web ads.

I feel like I’ve only touched on the animation side of things though.

You know you can even add video into your designs? That really grabs people’s attention. Well, if you want me to show you how to do that, let me know in the comments and we can make another video to go a little deeper. Oh, and I didn’t even show the animated elements you could use.

And mobile banners and background remover.

That’s really cool. And then this element sets, oh! Did you find this video helpful? If the answer’s yes, make sure you like and subscribe to our channel before you head off. We release new videos weekly and I’d hate for you to miss out. In fact, you could check out some of them now. Here are a few of my fabes. I hope you enjoyed it. Thanks for watching.

https://www.freedom.ws//index.dhtml?sponsor=yosekbaez60&chk=1

Quick Traffic Booster Pack (Promo Codes Bundle)
https://warriorplus.com/o2/a/tdxzbnr/0
https://youtu.be/V6PbUCk0-Yk

[glossary_exclude][/glossary_exclude]

Posted in Social Media | Tagged , , , , , | Leave a comment

How to make a printable weekly planner in Illustrator

Hello! I’m Cristina from Elan Creative Co and in this tutorial I’m going to show you how to make a printable weekly planner using Illustrator. This is the planner we are going to make. It’s fun, modern, and simple. I usually print them with my home printer, so I don’t want to have many colors or patterns.

And I love using Illustrator for this type of work because I feel I have more control over the layout than when I use InDesign. But I do use InDesign if I want to create documents that have many pages such as eBooks or workbooks. Open Illustrator and create a new document. I’m going to use A4 size paper. That’s 11 inches by 8 inches. The orientation is set to landscape and I’m going to add a bleed of 0.125 inches. The color mode is set to CMYK and the resolution to 300ppi. Click Create Document to continue. I’m going to start with the title area.

I’m going to use the Rectangle tool and this very light blue, and I will draw a rectangle that’s larger than my artboard. Then I’m going to rotate it a bit and then using the Selection tool I’m going to move it up here. I want to delete the area that’s outside the artboard so I’m going to use the Rectangle tool again and create a rectangle that’s the size, the width of my artboard. Then I’m going to use the Selection tool to select both of them and go to Window > Pathfinder and then Crop. So, as you can see, we have the background for the title. Let’s switch to the Type tool and change the color to black and add the text. I’m going to write “this week” and then change the font to a font called The Secret. It’s a free font that I really love. I changed the size to 72. Then I’m going to use the Align panel to center it and maybe just move it a bit down.

I’m going to group the two layers you can press Ctrl G or right-click on it and select Group and then I am going to lock the layer. The next step is to add a few rows. I’m going to switch to the Line Segment tool. The shortcut is backslash and I’m going to use a grey for the lines. And I’m going to set the stroke to grey. Hold down the Shift key to draw a straight line. We are going to fit four lines on our artboard. Set the stroke to one point and then open the stroke panel. Change the caps to round cap and check the dashed line box and enter four points in the first box. If you switch to the Selection tool you can see that we now have a dashed line.

[the_ad_placement id=”88″]
Next we are going to duplicate this line and move the second line under first. So hold down the Alt key until the cursor changes and then click on the first line and drag hold down Shift to align the second line with the first. We are going to use the Blend tool to create the rest of the rows. So select both lines and then double-click on the Blend tool, the shortcut is W, to open the options. Change the spacing to Specify Steps and then enter the number of steps you want.

So, we already have two rows, and I want to have six in total, so I’m going to enter 4 here then press OK.

Now click on the first line and then click on the second line. I’m going to expand all the objects. As you can see, now we have six lines instead of two lines, and then I’m going to expand the stroke. This is an optional step, but I like doing this in case I might need to use the Pathfinder tools. We are going to move it up here and then duplicate it to create four columns. So, hold down Alt to duplicate it, and then hold down shift to align it to the first. Do this for the other two columns. My columns are a bit too big so I’m going to just drag them all and make them just a bit smaller. So, let’s use the Align tool to make sure all the spacing is the same.

So, select Align to Key Object and I’m going to enter a half an inch. I think one inch is too big and then let’s select this one. I’m going to press the Horizontal Distribute Space button. I’m going to do the same for this one just to make sure that they are all aligned. I’m going to add the first four days of the weeks so I’m going to switch the color to black and use the Type tool. I’m going to use another font called Kristelle Sans. This one is not free, but you can use Amati from Google Fonts that’s similar and i think I’m going to change the size to 36. Now to align the day of the week with the row, let’s move it up, I’m going to select both of them and then go back to Align to Key Object and let’s select the rows and just press the Horizontal Align Center button then do the same for the other four columns. Now I’m going to select them all again and duplicate them. So again, I’m going to press the Alt key and then hold down the Shift key and move everything down.

Now we’re going to use the type of tool to change the names. So now we can group each column and then I’m going to group all of them. Now we’ll have to scale them again because they’re just too big. I think this is fine. Let’s create the check boxes for our To Do list. So, I’m going to use this pink and then switch to the Rectangle tool, and you can hold down the Shift key while you draw to create a square. Let’s zoom in now. I’m going to hold down Alt and Shift and drag it over here. I’m going to use the Blend tool again to create the rest of the boxes. So just select the Blend tool.

We have the same number of check boxes as we had lines so just click on the first and then click on the second. And if you want you can go to Object > Expand to have four rectangles then you can ungroup them and rearrange them if you need to. Let’s move everything. The last step is to create a small ribbon. So, I’m going to change the color and use the Rectangle tool again to create a small rectangle and then I am going to switch to the Add Anchor Point tool, the shortcut is +, and I’m going to add an anchor point here and another one on the right side. I am going to try to add it in the middle but it’s not very important. Then you can switch to the Anchor Point tool. Click on the first anchor point and using the arrow keys, the right arrow key, press about five times, maybe six, and then select the other one and click the left arrow key.

Now I’m going to switch to the Selection tool and send it to the back. Let’s rotate it a little bit. Add it over here. So, this is our weekly planner. Next, I’m going to show you how to save it. You should always save a copy as an Illustrator file. So go to File and save and give it a new name. I’m going to save it as an Illustrator CC file and then we are going to save another copy as a PDF. So go to Save as and change from Adobe Illustrator to Adobe PDF and click Save. If I’m going to print it on my home printer, I won’t change anything, but I am going to go to Marks and Bleeds and check Trim Marks then click Save PDF. This is how our PDF looks like. As you can see, it automatically added the trim marks and it’s ready to print.

Hope you’ve enjoyed this tutorial. If you want to see more Illustrator and Photoshop tutorials, please visit my blog or subscribe to my channel. Thanks for watching!

https://www.worldsite.ws//?sponsor=yosekbaez60&template=2

Posted in Video | Tagged , , , , , , , , , , , | Leave a comment

Add Videoask to Searchie hubs tutorial

Searched doesn’t really have sort of custom code sections that you can use. I mean you can make certain sections, and they have a certain template for it but this is the best way to add it. So here we have a hub. And you can see down here I have Video Ask right here. So, in that Searched hub we can use something called the Google Tag manager to be able to have a third-party tool like this Video Ask or other people have used something like Help Scout or User Guiding to do their onboarding.

And you can do this in a Google Tag manager. So again, this one’s pretty techy I’m going to try and break it down as simple as possible starting with what in the world is Google Tag manager.

So, it’s a way that you can put code on this Google Tag manager and have it reflected on your site without embedding the code on the site. So, Google kind of becomes a container to hold the code for on your website. And the advantage of this and a lot of times people use this for their Google analytics code for any uh SEO type tracking codes because the more code that you typically add to a site especially like a WordPress site, it can slow your site down.

So, using Google Tag manager, Google kind of acts as a  intermediary container to hold the code but it’s reflected on your site, but it doesn’t slow it down.  Just like Google always does, this is free.

We you all have access to this especially if you have Google analytics already set up. You can use it really very easily. So let me show you I’m going to show you the steps that I used.
So, you can start with a, they call it a container name under an account. I went ahead for my own purposes I created a separate account from my Kujabi site, and I called it a Saachi hub. So, I created an account named Searched hub and then within that account I created a container. And in my case the container is an individual Saachi hub. So, my plan is as I add Searched hubs, each one is going to have be a separate container because there would probably be in this…. in using Video Ask as an example. Different Video Ask for each one.


So, what I did is I created this container, and it is the Searched hub account membership tech hub, and I can show you really quick.

Let’s create a new container. So, I’m going to create a new container and call that…. And what you want to do is you want to say it’s for the web.  Now it immediately gives you this code and you might be tempted as I was, to go, oh this is the code that I need to put in Searched. But it’s not. So, we’re just going to say okay, and skip that. Let me just jump back because I don’t want to get too confusing let’s go over to the membership tech hub one so I can show you from here.

So once that was done this is what’s important. If you can see where I’m slowly circling my cursor is GTM W8L blah blah blah. So that’s what’s important.  That is what we need. So now from this standpoint then we needed to go ahead and make sure that we create that tag. So, I’m going to create…. I created that tag this was the configuration, and this was the other important part is the trigger that we want to set up.

And the trigger that I added, I’ll remove it and then I’m going to go back and re-add it is all pages. And then click add and save. Okay.  Now remember this code up here is the important part and I go went back to Searched.

I went to where I customized my hub. This is the top level of my hub.

I clicked on tracking; Google Tag manager and I pasted that container ID into this box. Scrolled down and I saved it. There it’s already saved so there’s no save button. So, I saved it then I went back to Google Tag manager, I click submit and publish. And then it just asks you a version description because if you change something all along….

you know, as of July 1st, 2021, I updated this. I might want to put it in here 2020….
July 1, 2021, update. I updated it because X. In most cases you’re just going to say continue and it’s going to say I’m publishing your version and that then is what displayed the Video Ask on the Searched hub.

https://www.supersalesmachine.com/r/JoseAmoros


https://virallinkbooster.com/c/unlock-the-traffic-method-i-used-to-get-1000-visit?ref=uj99x7v7

[glossary_exclude][/glossary_exclude]

Posted in Video | Tagged , , , , , | Leave a comment

The Best Free Online Article Spinner For PC or Mac – Spin Rewriter 5.0 Review

The Best Free Online Article Spinner for PC or Mac – Spin Rewriter 5.0 Review http://msjlikes.com/bestarticlespinnerforpcormac If you want the best free online article spinner for pc or mac, then I would highly recommend you look at Spin Writer 3.0. This is an online article spinner that you can access from anywhere on your pc or mac system.

With the article spinner 5.0 software, you can organize your articles into their own categories. This feature is great for when you have separate offline clients or selling different products of your own. You can have a free Spin Rewriter 5.0 platform, to use, for 5 days with no obligation.


They even have great tutorials on how to spin an article for best results.

Another great feature about this article spinner, Spin Rewriter 5.0, is that you can spin multiple articles all at the same time. Other spinners, such as The Best Spinner, you can only spin your articles one-by-one. If you don’t want to take my word for it, just go and get your free article spinner 5-day trial by visiting the link on this description area.

I know for me, this spin rewriter review has been a pleasure writing due to the simplicity and powerful platform that the Spin Rewriter 5.0 has shown me.

You might also be searching for: spin rewriter article spinner online article spinner best article spinner best article spinner for mac article spinner software spin rewriter review article spinner for mac article spinner mac how to spin an article the best spinner free article spinner To your future success in using the Best Free Online Article Spinner for PC or Mac, Spin Rewriter 5.0..

https://www.buildabizonline.com/ar/joseintercallosa36/?aid=8539

Posted in PC | Tagged , , , , , , , , | Leave a comment

Organize Your Documents with INSANE Efficiency (UPDATED)


One of the things I’ve become pretty good at over the years is helping people organize different aspects of their digital data, whether we’re talking about photos, music, emails, documents, et cetera. Seven months ago, I devised an easy to follow workflow that made organizing your documents incredibly straightforward. Since then, I have significantly refined the workflow, taking it to a brand new level. So if your documents folder is a hot mess, then this tutorial is for you. That’s coming up next on Tech Talk America.

Hey folks, and welcome to the class. Before we dive in, let me give you an idea of how this works. We’re going to treat your documents folder like we’re renovating a closet. And what’s the first thing you have to anytime you renovate? You have to start by clearing everything out and putting it into temporary storage.

Then we’re going to install a preassembled highly organized folder structure into your documents folder, so everything has a place to live. Think of it as California closets for your documents. Finally, we’ll migrate your data back into that structure. First, I want you to create a folder on your desktop called 2 B Organized. Now, I want you to take all of the files on your desktop, everything that’s in your documents folder, and maybe the contents of your downloads folder, and move everything into this folder.

At this point, you can either spend the next two hours creating something that mildly resembles the folder structure that I’m about to show you, Or for the cost of one cocktail, you can buy it preassembled from my website and be up and running in minutes to do so pop over to my website at Tech Talk America.Com and here on the homepage, scroll down and click on the buy now button.

After you’ve completed the payment, don’t close the window because then it will redirect you to we transfer. From here, click the “I agree” button at the bottom left, and then click “download.” At this point, you’ll want to go into your downloads folder, double click on the organized documents folder, select all of the contents, and move everything into your documents folder.

At this point, let’s take a look at this folder structure.

You’ll notice that some of these folders have a red tag next to them. Red tagged folders are designed to be shared with others. For example, there is a folder called family shared where you can store important files like family recipes, marriage certificates, medical records, power of attorney and more. To share a folder with a family member, just click on the folder and then click the share button at the top.

That’s the one that looks like a box with an arrow coming out of it. And I recommend that you send access via email. For those of you who have pets or kids, you’ll also notice that there are shared folders for babysitters and pet sitters. And if we go into those folders, you’ll find a simple form that you can fill out that contains all of the important information a babysitter or pet sitter might need in case of an emergency.

One of the things you should know is these folders are multiple levels deep.

For example, this is what the business folder looks like. And as you can see, there truly is a place for everything. If you go to church, there are folders for everything from confirmation documents to sacred texts. If you’re a student or teacher, there is a folder dedicated to education. At this point, I’d like to go over one of the major new features that was not available the last time I taught this class, you may have noticed that one of the folders is called “Find My Stuff.” If you’ve watched my videos over the years, we’ve talked in the past about smart albums, smart mailboxes, and smart playlists, but somehow, we’ve never talked about smart folders. A smart folder is basically an intelligent search. You give it terms and conditions, and then it finds every single file that matches those terms and conditions. Before we proceed any further, I do strongly recommend that you open a finder window.

Then go into the view menu and make sure that it is set to display the path.

That way you can see where these files actually live at the bottom of the window. So, let’s say you’ve got documents that are hiding in other locations that we have not considered. For example, let’s say you have an important PDF that you just can’t find. This Smart Folder will find every single PDF on your hard drive. These Smart Folders can also help locate large files that you might not need anymore.

The All-Movies Smart Folder, for example, will find every single video file on your hard drive.

When I did this on my computer, one of the surprises was I discovered duplicate files of every single movie I had ever purchased through iTunes. So not only will this smart folder help you get organized, but it may also help reveal hidden junk that is unnecessarily taking up space on your hard drive. Speaking of junk, another smart folder I’d like to bring to your attention is old iPhone apps.

Long story short, back in the early days of the iPhone, apps that you downloaded on your phone would be automatically backed up to your computer via iTunes.

And if you’re one of those people who has migrated your data from Mac to Mac over the years, there’s a really good chance that those ancient files are still there are still hiding on your hard drive and taking up space. The next few tricks I’d like to teach you will help you move files from the to be organized folder back into the appropriate place. What I recommend you do is open two finder windows next to each other.

One set to the documents folder and the other to the to be organized folder. Now, hover your cursor over the green dot to reveal the option for split screen mode.

I’ll move this window to the left, and now I can click on this window to move it to the right. For this process, I think you’ll find it most helpful if you set the To Be Organized folder into List View, which you can achieve by pressing Command 2, and the Documents folder I’d set to Column View, which is Command 3. Now, all you need to do is drag the files from the left into the appropriate folders on the right. Keep in mind, if you need any further assistance with this process, or if you have other questions about your Mac, iPad, or iPhone, you can work with me remotely from the comfort and privacy of your own home.

To book a session, please visit my website at Tech Talk America.com. Don’t forget to click the like button and thanks for watching. This is David A. Cox with Tech Talk America. Class dismissed.

https://www.supersalesmachine.com/r/JoseAmoros

Faith’s Tech Stack
https://faithsbizacademy.thrivecart.com/l/easter-bible-verse-wall-art-canva-templates/my-tech-stack-recommended-resources/


Posted in Documents | Tagged , , , , , , , , , , , , , , | Leave a comment